Encrypted Ubuntu - Step-by-step installation
This is for v8.04 but "should" work with version upwards.
Data encryption is one of the best methods to protect your sensitive files, especially if you own a laptop. Unfortunately, on the Ubuntu operating system, it's only available in the text mode installer. But that's why this guide is here, to help you install a fully encrypted Ubuntu OS on your computer.
The whole process is completely safe and it is recommended to be used by anyone out there who wants to protect his/her sensitive data. To break it down to you: No more living in fear! Your data will NOT be stolen anymore!
OK, OK, so what are the advantages of this encryption?
In order not to reveal data you may consider confidential, everything on that disk (including the SWAP space) will be fully encrypted;
Pre-boot authentication support. This way, you can set GDM (the GNOME login manager) to automatically log-in the default user.
Any disadvantages I should know of?
Except the fact that the whole installation process is done in text mode and it will take a little longer than the usual graphical installation, there are no other disadvantages!
Things needed:
Ubunto 8.04 Alternative CD
Let's begin, shall we? If you haven't already, get your copy of Ubuntu 8.04 Alternate CD right now from the above link, burn it on a blank CD with your favorite CD/DVD burning application, reboot your computer and boot from this newly created CD. Select your preferred language for the installation process...
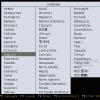
Then, the Ubuntu boot menu will appear, select the first option 'Install Ubuntu' and hit Enter...

Choose your native language and region...
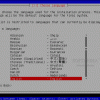
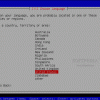
On the following screen, choose 'Yes' if you want to let the installer auto-detect your keyboard layout or choose 'No' to select a default layout from the next screen(s) (e.g. for a US English keyboard, select 'No', hit Enter, then on the second screen select 'U.S. English', hit Enter and on the third screen select 'U.S. English' again and hit Enter to continue)...


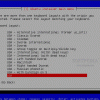
It will then detect some of your hardware components and configure the network with DHCP...

Enter a desired hostname when asked...

Configure the time zone...

Disk partitioning will start. Select the third option: Guided - use entire disk and set up encrypted LVM...

Choose the hard disk where Ubuntu will be installed...
Note: Please provide an MASTER (not SLAVE) empty hard drive for this installation, because all the data will be erased after you confirm the changes and in order to prevent the overwriting of the MBR (boot sector) in case you have another operating system installed.
Confirm the changes...

You'll be asked to enter a passphrase (a strong password; the longer, the better)...

Confirm the passphrase...

Note: Please write down the passphrase in case it's too long and you can't remember it!
Now, the partitioning tool will format the hard drive and create the default partitioning scheme. Confirm the changes...

The hard drive partitioning process will start:

And the base system will be installed...

Create a user and set up a password for it...


You will be asked to enter a proxy for the package manager. If you use a proxy, please enter it now. If not, just hit Enter on this screen...

The rest of the software will be installed now...

Then the GRUB boot loader will be automatically configured and installed...

Set the system clock to UTC...

The installation is complete now, hit 'Continue' to eject the CD and reboot the system...

When the system starts, you will be asked to input the passphrase that you've setup during the system's installation...


The system will continue to boot...

That's it folks, your whole Ubuntu 8.04 is now fully encrypted, like you've always dreamed of!

Have fun 
Notes: I got this guide from Softpedia, but can't find it anymore on their site.
Also here's a v8.10 install guide, but not much has changed.

